In the vast landscape of convenient snack options, few have captured the hearts of health-conscious individuals quite like Larabars. Renowned for their minimalist approach to ingredients, these fruit and nut bars quickly became a staple for those seeking a quick, clean energy boost. Among their classic offerings, the Cherry Pie flavor stood out as a fan favorite, boasting a surprisingly simple yet utterly satisfying blend of just three core components: cherries, dates, and almonds. This delightful combination delivered a taste reminiscent of homemade pie, without any of the added fuss or artificial ingredients.
However, for many long-time enthusiasts, the original quality and ethos of these beloved cherry pie larabars have seemingly shifted over time. The passion for simple, wholesome ingredients remains, but a growing desire for greater control over what we consume has led to an exciting resurgence: making these delicious bars at home. This article will guide you through the journey of recreating the authentic quality of original Cherry Pie Larabars in your own kitchen, allowing you to enjoy a superior, personalized snack that aligns perfectly with your wellness goals.
Rediscover the Magic: What Made Original Cherry Pie Larabars So Special?
The allure of the original Cherry Pie Larabar was undeniable, rooted deeply in its philosophy of "less is more." At its core, this snack was a testament to the power of whole foods, delivering natural energy and vital nutrients without any unnecessary fillers or highly processed elements. The ingredient list was refreshingly transparent, typically featuring just:
- Dried Cherries: Not only do these provide the signature tart-sweet flavor, but they're also packed with antioxidants, known for their anti-inflammatory properties and potential benefits for sleep and recovery.
- Dates: The natural binder and sweetening agent, dates are a powerhouse of fiber, potassium, and other essential minerals. They contribute a caramel-like depth and a wonderful chewiness, while also providing sustained energy release.
- Almonds: Adding a crucial textural contrast and a boost of healthy fats, protein, and vitamin E, almonds are essential for satiety and a well-rounded nutritional profile. They offer a subtle nutty undertone that complements the fruit beautifully.
This trifecta of ingredients created a perfectly balanced bar – a portable, energizing snack rich in natural sugars, healthy fats, and a decent amount of plant-based protein. It was, and still is, a perfect example of how simple, real food can be both incredibly delicious and genuinely nourishing.
Why Go DIY? Reclaiming Quality and Control
While the concept behind Larabars remains commendable, a common sentiment among consumers is that the product's quality and perhaps even its ingredient sourcing have evolved since the company's acquisition by larger corporations. This perceived shift often fuels a desire to return to the roots – to a time when every ingredient felt intentionally chosen and minimally processed. Crafting your own cherry pie larabars at home offers a multitude of compelling advantages:
The Power of Ingredient Transparency
When you make your own snacks, you are the ultimate quality control manager. You get to hand-pick every single ingredient, ensuring it meets your personal standards for freshness, origin, and ethical sourcing. Want organic dates? No problem. Prefer locally sourced almonds? You can make that happen. This level of transparency is invaluable, especially for those with dietary sensitivities or specific health goals. You can avoid hidden sugars, unnecessary preservatives, or oils that might creep into commercially produced versions, giving you peace of mind with every bite.
Economic & Environmental Benefits
Let's face it, convenience often comes with a premium price tag. Store-bought Larabars, while convenient, can add up quickly, especially if they're a daily staple. Making them at home is remarkably cost-effective. Dried fruits and nuts bought in bulk are significantly cheaper per serving than pre-packaged bars. Furthermore, by making your own, you drastically reduce your reliance on single-use plastic wrappers, contributing positively to environmental sustainability. Reusable containers for storage become your new norm, minimizing waste one delicious bar at a time.
Customization is Key
One of the most exciting aspects of DIY snacking is the freedom to customize. While the classic cherry pie combination is fantastic, your kitchen becomes a laboratory for culinary creativity. Want a little more almond crunch? Add extra. Prefer a slightly less sweet bar? Adjust your date-to-cherry ratio. You can also experiment with subtle additions to enhance the flavor profile: a pinch of sea salt to elevate the sweetness, a dash of vanilla extract for warmth, or even a hint of cinnamon or cardamom for an exotic twist. The possibilities are endless, allowing you to tailor your snack precisely to your palate.
Crafting Your Own Cherry Pie Larabars: A Simple 10-Minute Recipe
The beauty of these bars lies not only in their ingredients but also in their incredible simplicity and speed of preparation. You'll be amazed at how quickly you can transform a handful of pantry staples into a week's worth of energizing snacks. No baking, no complex techniques – just a food processor and a few minutes of your time.
Essential Ingredients:
- 1 cup (about 150g) raw almonds
- 1 cup (about 150g) pitted Medjool dates, packed (ensure they are soft and fresh)
- 1 cup (about 150g) unsweetened dried cherries
- (Optional) Pinch of sea salt, 1/2 tsp vanilla extract, or 1-2 tablespoons of water if mixture is too dry.
Simple Steps:
- Process Almonds: Add the raw almonds to your food processor. Pulse several times until they are finely chopped but still have some texture – a coarse meal. Be careful not to over-process into almond butter.
- Add Fruit: Add the pitted dates and dried cherries to the food processor with the almonds.
- Blend to Dough: Process continuously until the mixture comes together into a sticky, cohesive ball or a thick, uniform dough. This usually takes 1-2 minutes. If the mixture seems too dry and isn't coming together, add water one teaspoon at a time until it reaches the desired consistency.
- Press and Chill: Line an 8x8 inch baking dish or a small loaf pan with parchment paper, leaving an overhang on the sides for easy removal. Press the mixture firmly and evenly into the prepared pan. Use another piece of parchment paper or your hands to ensure it’s tightly packed.
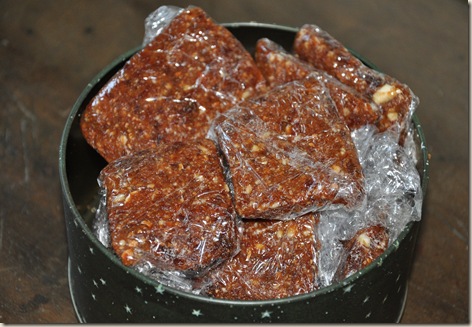
- Cut into Bars: Refrigerate the pressed mixture for at least 30 minutes to firm up. Once chilled, lift the slab out using the parchment paper overhang and cut it into desired bar sizes (typically 10-12 bars).
And just like that, you have a batch of incredibly fresh, nutritious, and delicious cherry pie larabars ready to fuel your day! For a detailed, step-by-step guide on how to prepare these nutritious snacks in record time, check out our article on Homemade Cherry Pie Larabars: Quick 10-Minute Energizing Snack. You'll be amazed at how quickly you can Craft Your Own Cherry Pie Larabars: Simple Ingredients, Big Energy and have them on hand for any moment.
Tips for the Perfect Homemade Cherry Pie Larabars
While the recipe is straightforward, a few expert tips can elevate your homemade cherry pie larabars from good to absolutely phenomenal:
- Date Quality Matters: Always opt for fresh, soft Medjool dates. They are naturally moist and sticky, which is crucial for binding the bars without needing extra liquids. If your dates are a bit dry, soak them in warm water for 10-15 minutes, then drain thoroughly before using.
- Unsweetened Cherries for Control: Choose unsweetened dried cherries to control the overall sweetness of your bars. Dates provide ample natural sugar, and adding pre-sweetened cherries can make the bars overly cloying.
- Texture Play: For a chewier bar, process the nuts and fruit until just combined, leaving some larger chunks. For a smoother, more uniform bar, process longer until the mixture is very fine and sticky.
- Mastering the Stickiness: If your mixture is too sticky to handle, lightly dampen your hands with water or oil when pressing it into the pan. If it’s too dry, add a teaspoon of water, almond milk, or even a tiny bit of coconut oil at a time, processing after each addition, until it reaches the right consistency. Conversely, if it's too wet, a tablespoon or two of almond flour or finely ground oats can help absorb excess moisture.
- Storage for Longevity: Store your homemade Larabars in an airtight container. They will last for 2-3 weeks in the refrigerator, or up to 2-3 months in the freezer. Wrap individual bars in parchment paper or beeswax wraps for convenient grab-and-go snacking.
- Flavor Enhancements: Don't be afraid to experiment! A tiny grating of orange zest can brighten the cherry flavor. For a richer, more complex profile, consider adding a tablespoon of unsweetened cocoa powder. A mix of nuts, such as half almonds and half walnuts, can also offer a different dimension.
Recreating your favorite snacks at home empowers you with knowledge, control, and endless possibilities for customization. With minimal effort and just a few wholesome ingredients, you can consistently enjoy delicious, nourishing snacks that truly meet your standards.
Embracing the DIY approach to cherry pie larabars is more than just a money-saving trick; it's a statement about reclaiming control over your nutrition and savoring food in its purest form. By choosing your own ingredients, you ensure superior quality, avoid unwanted additives, and gain the flexibility to tailor each bar to your exact preference. In just 10 minutes of active prep, you can create a batch of wholesome, energizing snacks that are not only reminiscent of the original beloved Larabar but often surpass it in freshness, flavor, and nutritional integrity. So, ditch the store-bought versions and dive into the rewarding world of homemade goodness – your taste buds and your body will thank you!
